Classic Granny Square Blanket
Six-round granny squares, joined into a throw. Portable, scrap-friendly and endlessly adjustable.
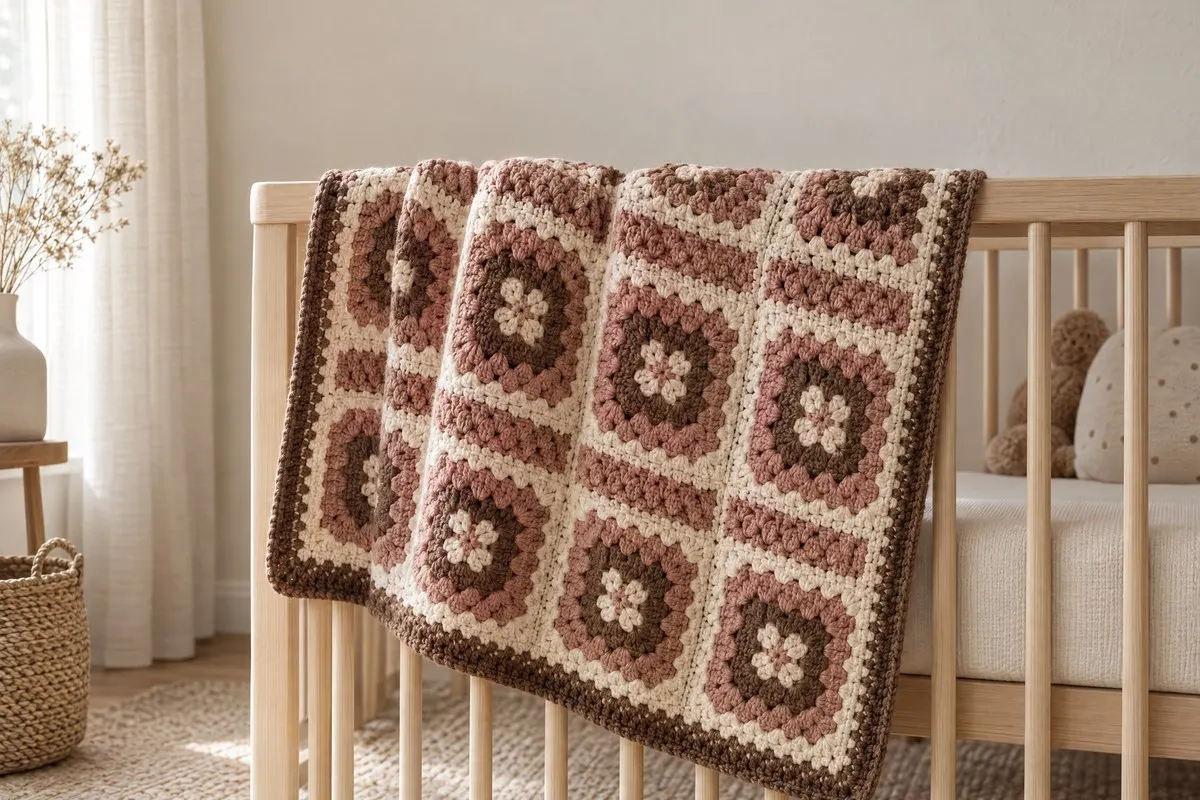
- Yarn
- Worsted (4) in as many colours as you like, plus one joining colour.
- Hook
- H-8 (5 mm)
- Sizes
- Throw 50 × 62 in (127 × 157 cm) with border. Any size from the blanket chart works.
- Example gauge
- One 6-round square = 6 in (15 cm)
- Yarn needed
- About 2,900 yd (2,650 m) worsted. Pick “Lace/openwork” in the calculator (granny uses about 15% less than solid dc).
US terms. The UK name follows in brackets the first time each stitch appears. Turning chains don’t count as stitches unless a step says so. See US vs UK crochet terms and crochet abbreviations.
Do the math
The examples use the gauge above. Put your own swatch into the gauge calculator first, then use your numbers in each formula.
| Step | Formula | Example | Tool |
|---|---|---|---|
| Squares across | (width − 2 in border) ÷ square size | 48 ÷ 6 = 8 | Size Charts |
| Squares down | (length − 2 in border) ÷ square size | 60 ÷ 6 = 10 | By hand |
| Total squares | across × down | 8 × 10 = 80 | By hand |
| Border | (target − squares) ÷ 2 each side | (50 − 48) ÷ 2 = 1 in of border | By hand |
Materials
- Worsted (4) yarn (see yarn needed)
- H-8 (5 mm)
- Tapestry needle
Gauge swatch
Make one square. Your square size is your gauge; measure it flat after a light steam.
Instructions
Granny square
Rnd 1: Ch 4, sl st (UK ss) to first ch to form a ring (or use a magic ring). Ch 3 (counts as dc (UK tr)), 2 dc in ring, ch 2, *3 dc in ring, ch 2; rep from * twice more. Sl st to top of ch-3. (4 clusters)
Rnd 2: Sl st in next 2 dc and into the ch-2 corner. Ch 3 (counts as dc), (2 dc, ch 2, 3 dc) in same corner, *ch 1, (3 dc, ch 2, 3 dc) in next corner; rep from * twice more, ch 1. Sl st to top of ch-3.
Rnd 3 and on: Sl st to the corner. Ch 3 (counts as dc), (2 dc, ch 2, 3 dc) in corner, *(ch 1, 3 dc) in each ch-1 sp along the side, ch 1, (3 dc, ch 2, 3 dc) in next corner; rep from * around, ending ch 1. Sl st to top of ch-3.
Work 6 rounds (or to your square size). Change colour at the start of any round. Fasten off.
Join
Lay out the squares 8 × 10. With the joining colour, sc (UK dc) or whipstitch through the back loops of the edge stitches, joining in strips, then the strips to each other.
Border
Rnd 1: Sc evenly around, 3 sc in each corner. Rnds 2–3: Hdc (UK htr) in each st, 3 hdc in each corner st. Fasten off.
Finishing
- Weave in ends as you finish each square, not at the end.
- Steam or wet block the finished blanket.
Designer’s notes
- Join-as-you-go: on the last round of each new square, replace each ch-1 and ch-2 space with a sl st into the matching space of its neighbour.
- Always start each round in a corner so the seam of rounds hides in the corner.
Counter set-up
Counter 1: rounds in the current square. Counter 2: squares made (goal 80).
Open the row & stitch counter for several counters, or use the quick one below.
Tools for this pattern
- Size ChartsLook up the finished measurements for the size you are making.
- Yarn Quantity CalculatorPick the project, size and yarn weight to get total yardage and skeins to buy.
- Gauge CalculatorEnter your swatch counts to get stitches and rows per 4 in (10 cm).
- Row & Stitch CounterSet up the counters listed below; the screen stays awake while you work.